Tuesday, September 10, 2013

Crafty little cabinet


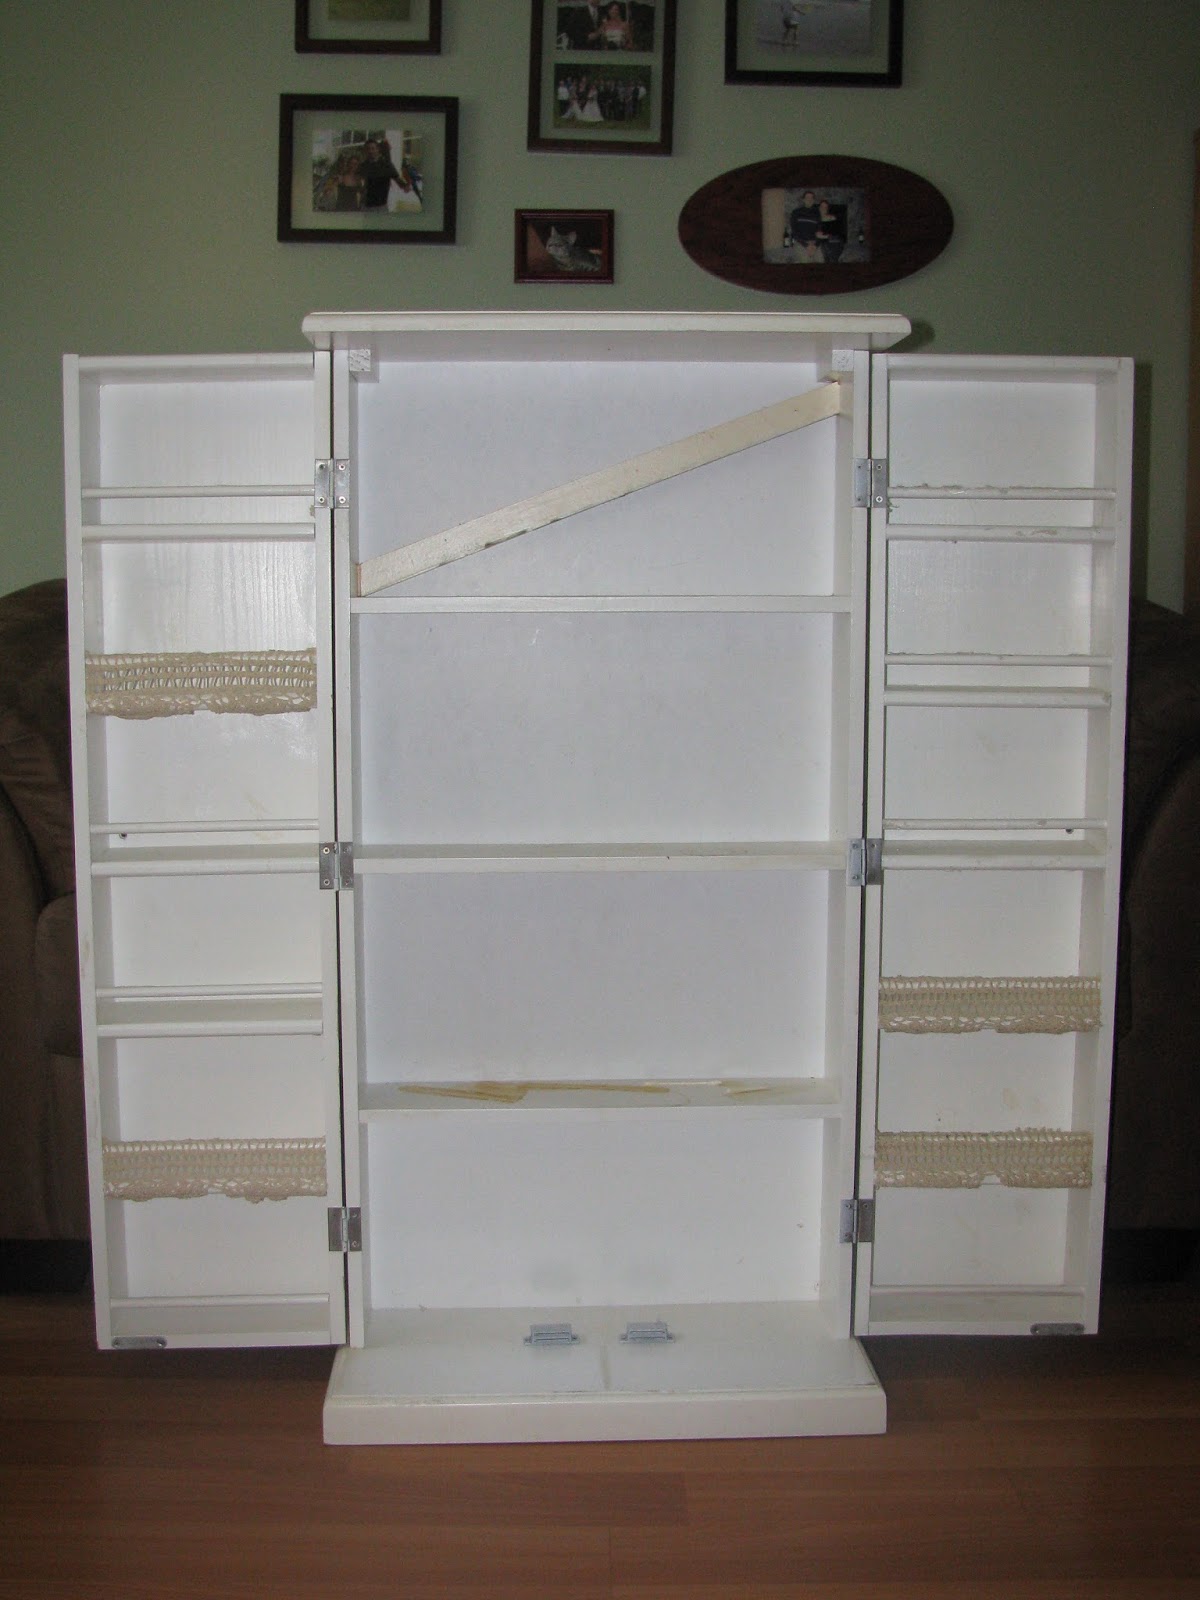
A friend of mine picked up this cute little cabinet from his grandmother and immediately thought of me. The inside was a wreck, someone had hot glued croqueted doilies to the shelves and something had spilled on one of the shelves and turned hard and resin-like. The outside looked great though and it was totally unique so I just had to have it!
The fabulous inside

Filthy but cute!
I scrubbed it up and scraped all that awful hot glue off then sanded it lightly. The inside was pretty stained and despite my best efforts to get off that resin-like spill (I even used paint stripper!) it made it apparent that it wasn't going anywhere so I decided to paint the inside a slightly darker color than the outside. I decided right off there was NO WAY I was going to hand paint the inside so I taped it up and used some news paper and spray painted the heck out of the inside. The outside got primed and painted a high gloss sand color I had left over from another project.
Ready to spray!
Already a huge improvement


Reassembled with a new coat of paint

Why yes, there is a school bus and taxi holding my doors open ;)
 It still needed...something. After some Pinterest perusing I decided I really, really, REALLY wanted to try antiquing using tinted glaze and this was just the project to test it out on. I picked up some pre-tinted glaze in a smallish bottle at Lowes and some el cheapo foam brushes and planned on antiquing this bad boy during my little guy's next nap.
It was kind of nice really. It was an overcast rainy day so I spread out my drop cloth in the living room, turned on some cheesy ghost hunting documentary on Netflix (don't judge) and glazed away. I wore gloves because this time I was going to preserve my at-home mani dammit!

Got all my stuff together, why do I not have a glass of wine with this?!

Subtle but it came out great!
I'm really happy with this one. I was going to keep it but it don't have a place or a purpose for it so I've decided to sell it instead. I'm not sure what it's intended purpose is but it would make a great cabinet for a crafter, painter or even in a pantry!

A few notes about antiquing using glaze:
I used this Valspar Antiquing Glaze which is tinted in Asphaltum (black). It only cost a little over $9! The instructions on the bottle say to use a damp cloth and rub in using a circling motion and then wipe off excess. I applied it liberally with a foam brush and then used an old T-shirt rag that I could just throw out afterwards (I'm not big on clean up) that I could rub it down with. I ended up with a somewhat subtle finish which I really like. The glaze landed in all the crevices and stayed as well as slightly tinting the flat surfaces.
A close up of the finish (please excuse my yoga mat :)
 Lessons Learned:
1).  A little bit of antiquing glaze goes a long way so start with the smaller bottle like this. I used maybe a 1/4 cup for this whole project so this bottle will last me a while.

2). Wear gloves! I was so glad I did. This stuff gets messy.

3). Don't be afraid to try this technique. It was surprisingly easy to work with! It has a 15 minute dry time which gives you plenty of time to obsess over how much gets left behind on your project as long as you work in sections.

I am so glad I tried this out, you see it all over Pinterest but for some reason I wasn't into it until I saw this and this. I'm definitely looking forward to trying it out on other things and seeing it's many different applications! Have fun and go antique something!

Tuesday, August 13, 2013

Peek-A-Boo Blue End Tables


Earlier this summer I had picked up a set of end tables at a yard sale for $5! That's TOTAL! The man that sold them to me told me that he built them himself and while the amateur job was obvious I couldn't pass up such a good deal. The tables are very thick cut solid wood and seemed pretty sturdy so despite the rough job I thought a face lift might make these a decent project for a flip.

sorry for the heavy shadows
Being an amateur job, there were A LOT of holes to fill. One of the end tables was nailed together and the other was screwed together. The screws were counter-sunk and so those all needed to be filled and one of them had screws just randomly sticking out the bottom front so after I took those out I had to fill those holes as well. The caps he placed over the screws in the very top of one of the tables were missing so I had to fill those big gaps too. Yay for sandable wood filler!


The original stain was pretty thin so I decided to be lazy and just hand sand the tables down before priming them with spray primer. That's what the guy must have done before staining them too because the wood is pretty rough in some places. Meh, there was no way I was going to make these things perfectly smooth without putting in more work than was worth it so I went with it hoping that the rough spots would just lend some rustic charm to the finished product. People like rustic, right?

I used the same spray paint that I used for my little end table that I did for my living room, a nice dark walnut with a satin finish. I got 2 coats out of the 2 cans plus a little extra from a previously used can for the damned bubbling that happened when I had to leave them in the sun to run off and get my 2 year old who woke up from nap freaking out. I clear coated the drawer fronts and the tops of each unit for extra shine and durability. I also repainted the drawer pulls with a metallic finish spray paint in rubbed bronze.
Primed- already an improvement

I wanted the back side of the front piece of the drawer to also be the dark walnut color so I carefully primed that as well.

I used a paper bowl and screwed the drawer pulls into it so that they would stick out enough to allow painting from all angles for complete coverage. It worked GREAT!
A close up

Of course, the real hero of this story is the pop of color on the interior of the drawers. I really wanted to do something a little fun with these plain jane end tables. I happen to have several shades of blue paint laying around so I painted the insides of the drawers with a nice light blue and put some of the black and white damask pattern contact paper on the bottoms of each drawer. I love the impact it has! With the drawers closed they're all business but open up the drawers for their wild and crazy side. Kind of like the sexy librarian of furniture :)

I painted the entire interior of the drawers blue except for the front piece and the bottom which I covered with the damask contact paper. I used some spray adhesive to give some extra sticking power to the contact paper. One of the drawers was particularly rough so the extra adhesive was necessary to stick the contact paper down.
Looks sharp!
 Here's the finished project!


Lessons Learned:

1). Its important to thoroughly clean the surface between sanding and priming. I wiped it down with a dry cloth but I think I should have cleaned it better. After applying the first coat of paint I found that in some places the paint was crackling up. My theory is that those areas weren't clean enough and created differences in the way the paint dried resulting in patches of "crackles".

2). Direct sun = bubbles! I already knew this but now I know that shadows move quicker than you'd think.

3). Calling imperfections "rustic" makes you feel better about them :)

These little end tables certainly aren't perfect but they do look a lot nicer with a slick new coat of paint!

Thursday, August 1, 2013

DIY Ring Stands

Hubby recently lost his wedding ring (**gasp!**) for a week before it was located which got me thinking it was time to come up with a better way for us to store our rings when we aren't wearing them. I had picked up a couple super cute, tiny little picture frames at Christmas time for $1 with a gift in mind but that gift fell through so I thought they'd be perfect for this little project.

I found some scrap paper in my scrapbooking supplies that worked well and cut some squares to fit. I added a little "Mr" and "Mrs" to my paper and loaded the paper in the frame. I used a couple of silver tipped push pins stuck into the plastic fronting at an angle and slightly higher than in the middle so that the rings would rest roughly in the center. The pins were too long so I cut a bit off the end with my needle nose pliers and stuck the pins back in the holes I already made when I stuck the pointy end in the first time.
the pins are a little blurry but you can see that I cut about a third of the length of the pin off

done!
This was an easy project that I can enjoy daily! I put them in the upstairs bathroom on the vanity shelf so that when we take off our rings when we're getting ready for bed we can hang them safely on their new stands. Now if I can just get my husband to stop keeping his ring in his pant's pocket while he's at work!

Updated 8/26/2013- I did not follow any tutorial when I made these little ring stands but I do want to give credit to the inspiration behind my project here.

Monday, July 15, 2013

Some funnies I made!

It's been a very rainy summer so far here in north eastern NH alternating with incredible heat so I haven't been able to work on any projects lately. We've also been planning for and then going on a last minute vacation so I haven't had much time for any DIY projects. I find that humor relieves my stress so I did make a few internet memes that I can share. That counts, right?

someecards.com - Wake me up when the kids are rich doctors and they can take care of me.

someecards.com - That moment when you discover the show you picked for your kid on Netflix without paying attention was a sing a long.

someecards.com - I hope the bus you threw me under swerves to hit you on the sidewalk.

someecards.com - Nothing brings a feeling of satisfaction quite like watching the Karma Train steam into I Told You So station.

someecards.com - Which would you prefer? Domestic Goddess? Or sex kitten? Until you're cooking and cleaning with six pack abs you're not getting both either.

someecards.com - Oh, yes. Please tell me more about how horrible a friend I am. Your hypocrisy is really quite entertaining.

Hope you had a good laugh!

Tuesday, June 11, 2013

Oh crap, it's laminate. Oh well!


So I found this little white cabinet on one of my much traveled Facebook yard sale sites for $20. I couldn't tell what it was made of from the picture online and was hinging my purchase on whether it was wood or laminate. The previous owner stated it was wood so I packed the kids into the minivan and drove all the way to Kittery ME to pick it up. I get it in the van and guess what? Its laminate!
Here it is in all it's plasticky glory
 I don't think the woman I bought it from was trying to be deceptive but rather had no idea what the difference was. I desperately needed a storage solution for my entryway and this little cabinet was exactly the right size and compared to the much smaller $80-ish unit I wanted at Ikea I figured 'oh well, I drove all this way right?' so home it came.

It had been in use about a month or so before I got the chance to do anything with it but I used that time to do a little research on how to paint laminate. We've all seen the Pins, they're all over Pinterest! One thing they ALL had in common was priming is a NECESSITY. I lightly sanded it a little bit just to kind of rough up the smooth surface so that the primer would have something to stick to and then primed it. I chose a simple sand color that will coordinate well with my living room colors and wont darken up my small entryway.

Ready to prime and paint!
So far this is a very boring story. I know it. You know it. But here's where it gets more interesting (I hope anyway!). I bought some contact paper for like $5 at Target that has a really graphic and bold black and white damask pattern on it and it's going on the back wall of the piece for a pop of fun! 
I had to cover this up. I mean seriously, look at it. Blech.
While I waited for the second and final coat of paint to dry, I took the cardboard back that I had removed earlier and carefully put the contact paper on the front side (which was taped together with some really old masking tape). From there I basically wrapped it like a present. A beautiful present to me :)
I made a cut in the contact paper to avoid bulging corners

Once the contact paper was folded down on both the long and shorts sides I was left with a tab that stuck out.

I just cut that sucker off :)
 Once everything was dry I put it all back together and wow! It was dingy, scratched and marked up when I started but now its sleek, clean and very modern looking.
It really looks incredible

Here it is in my little entryway. You cant see the damask backing very well with the baskets in there but up close it's still a very nice touch.
Its hard to see the color difference but the damask backing is whats so exciting about this makeover!
Lesson Learned 1). Laminate can be painted so don't let it be a deal breaker if you find something free or cheap that fills a need. Priming worked great but I wish I had used a better quality brush or rolled it on the flat surfaces. The oil based primer I've been using is a major B to clean up so I used an older, low quality brush hoping that sanding and using a good quality brush and roller for the 2 coats of paint would make up for it. While it's not super noticeable you can see the brush strokes in some places.

Lesson Learned 2). Do not be afraid to gussy up the boring cardboard or particle board backings on things. Many pins I have on my boards suggest using wallpaper scraps or fabric for this use but contact paper was inexpensive and super easy to use. I don't know what the durability of it will be long term but I'm sure it will be on par with painted laminate :)

Lesson Learned 3). While a high quality brush does seem to leave less visible brush strokes than the el cheapo brushes, your last layer is only as good as your first. Especially when you are too impatient, er... you don't have a lot of time to spend on sanding between coats.

Anyway, the only reason I blogged this makeover is because something as simple and easy (and CHEAP!) as contact paper really elevated this piece from something to hide in the back room to something to be proud of! Now stop reading and go get some contact paper!

Monday, June 10, 2013

A dresser for me

Through a somewhat unusual turn of events I found, passed over and then had my attention re-diverted to this dresser. Before I knew it, this solid wood dresser was being delivered to me in a hatch back Volkswagen for a steal of $30! My husband came home from work and I had to explain that oh yeah, some people were coming in about half an hour to bring us a dresser you didn't know we were buying. I seem to acquire things this way; dressers, cats, etc. Good thing he loves me :)

Its got nice looking bones but clearly the paint has got to go!

It also has some slight damage to the top and sides but it looked like an easy fix to me
All my previous projects have just required some sanding but this bad boy was going to need to be stripped.
Not that kind of stripping!
I bought a citrus based stripping product I had seen used in a blog once and tested it out on one of the drawers. It worked great! That weekend I had my husband help me drag the dresser outside and set about getting that horrible paint off.

A rainbow of horrible colors!
 I don't have many pictures of this part but trust me when I say this was no fun. I ended up needing 2 cans of the stripper and still needed more in areas where I hadn't put it on thick enough. Once the stripper has set for a few hours you can just scrape off the gooey gunk with a plastic scraper. I scraped and scraped for HOURS. Then, I rubbed and rubbed with mineral spirits to clean it up. They're not kidding when they say you need to apply the stripper GENEROUSLY. You really have to goop it on there. I had lots of areas where my application was a little thin and the stripper didn't make it through all the layers of paint. I did the best that I could until both the dresser and I were starting to look a little distressed. I actually had to take a break for a couple of days afterwards because my right arm hurt so bad.


This is what it looked like after an exhausting afternoon of fighting the many, ugly layers of paint that had been put on this poor thing.

One night about a week later after the kids went to bed I reapplied some more stripper (this time I bought a bottle of it instead of a spray can and applied with a cheap foam brush) and got off the rest of the paint. It really does work good when you follow the instructions *sheepish grin*.

Next I hand sanded it lightly with a heavier grit paper (because that's what I had and I was NOT going back to that damned store), used some wood filler to fill in the dents and dings and started priming it. No sooner had I gotten one coat of primer on it than the clouds started to roll in. Luckily I was able to get the second coat on it and back inside before the rain started to fall.
 Not a very exciting picture but its amazing how different it looks without that sickly yellow paint on it.

Woah. Where did you come from?
Eventually, days later, I made it back outside with the dresser to paint it. I was so excited about the color I picked out and also just to finish this project so I could get it out of my dining room that I wrestled it outside by myself. I even put it in the shade to avoid bubbling of the paint as it dried. I started painting while the kids played and noticed more clouds coming my way. Really?! The forecast said the rain wasnt supposed to come until later in the evening so I kept at it hoping my husband would get home in time to help me bring it back in. After all, furniture wrestling and hour-dry paint don't really go together. To my horror, it started to sprinkle on my newly painted dresser *gasp*! Luckily my neighbor helped me bring it in but I could see that the water was messing up my finish.

Apparently I didn't take any pictures of this part but during nap this last week I lightly sanded the somewhat splotchy surface and put a third coat of paint on it. INSIDE. I used small foam rollers designed for painting cabinets and they were well suited to painting the larger, flat surfaces of the dresser. Once dried it looked really good but I opted to top coat just the very top of the dresser with clear coat for extra durability.

I love how it came out!
I added some new hardware as well.

Please excuse my bare walls. Our bedroom has been last in line for decorative attention. Its going to get painted soon, I promise!!

Lessons Learned:

1). When the directions on a product says "apply generously", they mean it!! The stripper worked wonderfully in the spots where the product was really thick and I could have saved myself a lot of work and sore muscles if I had made sure the whole thing was covered that thick.

2). Stripping paint off is hard work but totally worth it. I was able to get down to the bare wood which made priming and painting a breeze. Also, I got a nice smooth finished product for all my hard work!

3). NEVER trust the weather in New England :)

Although this project took forever, I'm really very happy with the end product. Now that the dresser is in my bedroom where it will be used I can shuffle my newest finds around downstairs. Like I said, its a good thing my husband loves me so much :)