I have a soft spot in my heart for broken, unwanted things. It explains a hand full of my high school and college friendships and certainly half the furniture in my house so when my neighbor told me there was a dresser in front of one of our dumpsters I couldn't resist. I tossed the kids in the wagon and went to check it out. It was broken and abused. Sad and unwanted. But solid wood with dovetailed drawers. Of its 4 drawers, one was completely missing and another was broken, its front face dislocated completely from the rest of it. I saw through it's rough demeanor and brought the van back to get it. I wrestled it into the back of my van by myself and drove it back to my unit with the hatch open, that's how determined I was to save her from the land fill.

Despite the missing drawer I saw that the ledge where the top drawer had rested was completely flat and level all the way to the back of the dresser and could easily (and fabulously!) be converted into a shelf. The broken drawer was an easy fix as none of the joints were broken, it was just dislocated. I busted out my wood glue and put it back together. There was a big chunk missing from one of the legs which I planned to fix with wood filler and the top sheet of wood was peeling up but that got glued and clamped over night. With her major repairs done, I just needed to clean her up and give her a makeover.
 |
| A puzzle that hopefully won't come undone again |
 |
| I forgot to take the picture with the clamps on but this is the corner where the top board was peeling up- FIXED! |
A month or two passed and it hung out in my dining room next to the ill fitting corner hutch (positioned flush against a straight wall) while I worked on smaller projects and generally enjoyed the summer with my kids. It was really quite useful and re-fired my desire for a more fitting dining room storage piece (more about that later). In the meantime I was trying to decide how to refinish this little gem when it hit me one day while looking through my boards on Pinterest. I really like how
this dresser re-do looks with a painted and antiqued body and stained top portion. That was it!
It had been storming pretty hard here in New Hampshire but I decided I could safely strip the top of this dresser right in my kitchen while my youngest napped and my oldest was in school (the jug says safe for indoor use). I gooped it on there nice and thick and gave an hour or so before scraping. As I thought, the stain didn't come off completely in the tight little crevices but I like how it looks anyway so I'm not going to worry about getting every scrap of old finish off.
 |
| Proof that I did, in fact, apply generously! |
 |
| Scraped and cleaned up- already a big improvement! |
 |
| A close up of the result |
It continued raining for a couple of days after that so I gave it all weekend to dry out completely before sanding. I did a lot of reading about how to apply stain and polyurethane and like always it was very clear that sanding is a must. I started with a very course grit sand paper (100) and worked lightly with the grain on just the stripped top of the dresser. It took the remaining finish off without any real effort on my part. I finished it off with a fine grit (220) and again lightly worked with the grain. It was super smooth after, like buttah. After that I used the same piece of fine grit and lightly roughed up the rest of the dresser. My goal is to do an antique finish on this so I don't want to loose all that authentic wear in the current finish. I also discovered during sanding that the pink looking blob on the unsanded drawer below was more likely to have been an escaped bit of stripper rather than frosting like I thought. It did eat through the finish a little and left a blob shaped dent which I didn't want to sand down too much partly because I was worried about blending it and partly because I just didn't want to. I'm impatient, we've covered this :)
 |
| Yes, this is the actual width of my galley kitchen. And yes, I did this all inside my tiny kitchen. And yes, I did have dust everywhere afterwards. |
With the dresser all sanded down it was time to finish her. I wandered around Home Depot for like an hour and a half pondering and picking out paint, stain, polyurethane and brushes. I had a piece of plywood cut by a very nice (and patient) man to my exact dimensions and was lucky enough to find a simple piece of skinny edging that was almost the same exact width as the plywood. Overall it was a very pleasant trip with my 6 year old daughter who was fascinated by the saw and the paint mixing machine and happily played games on my phone while I poked about the rest of the time.
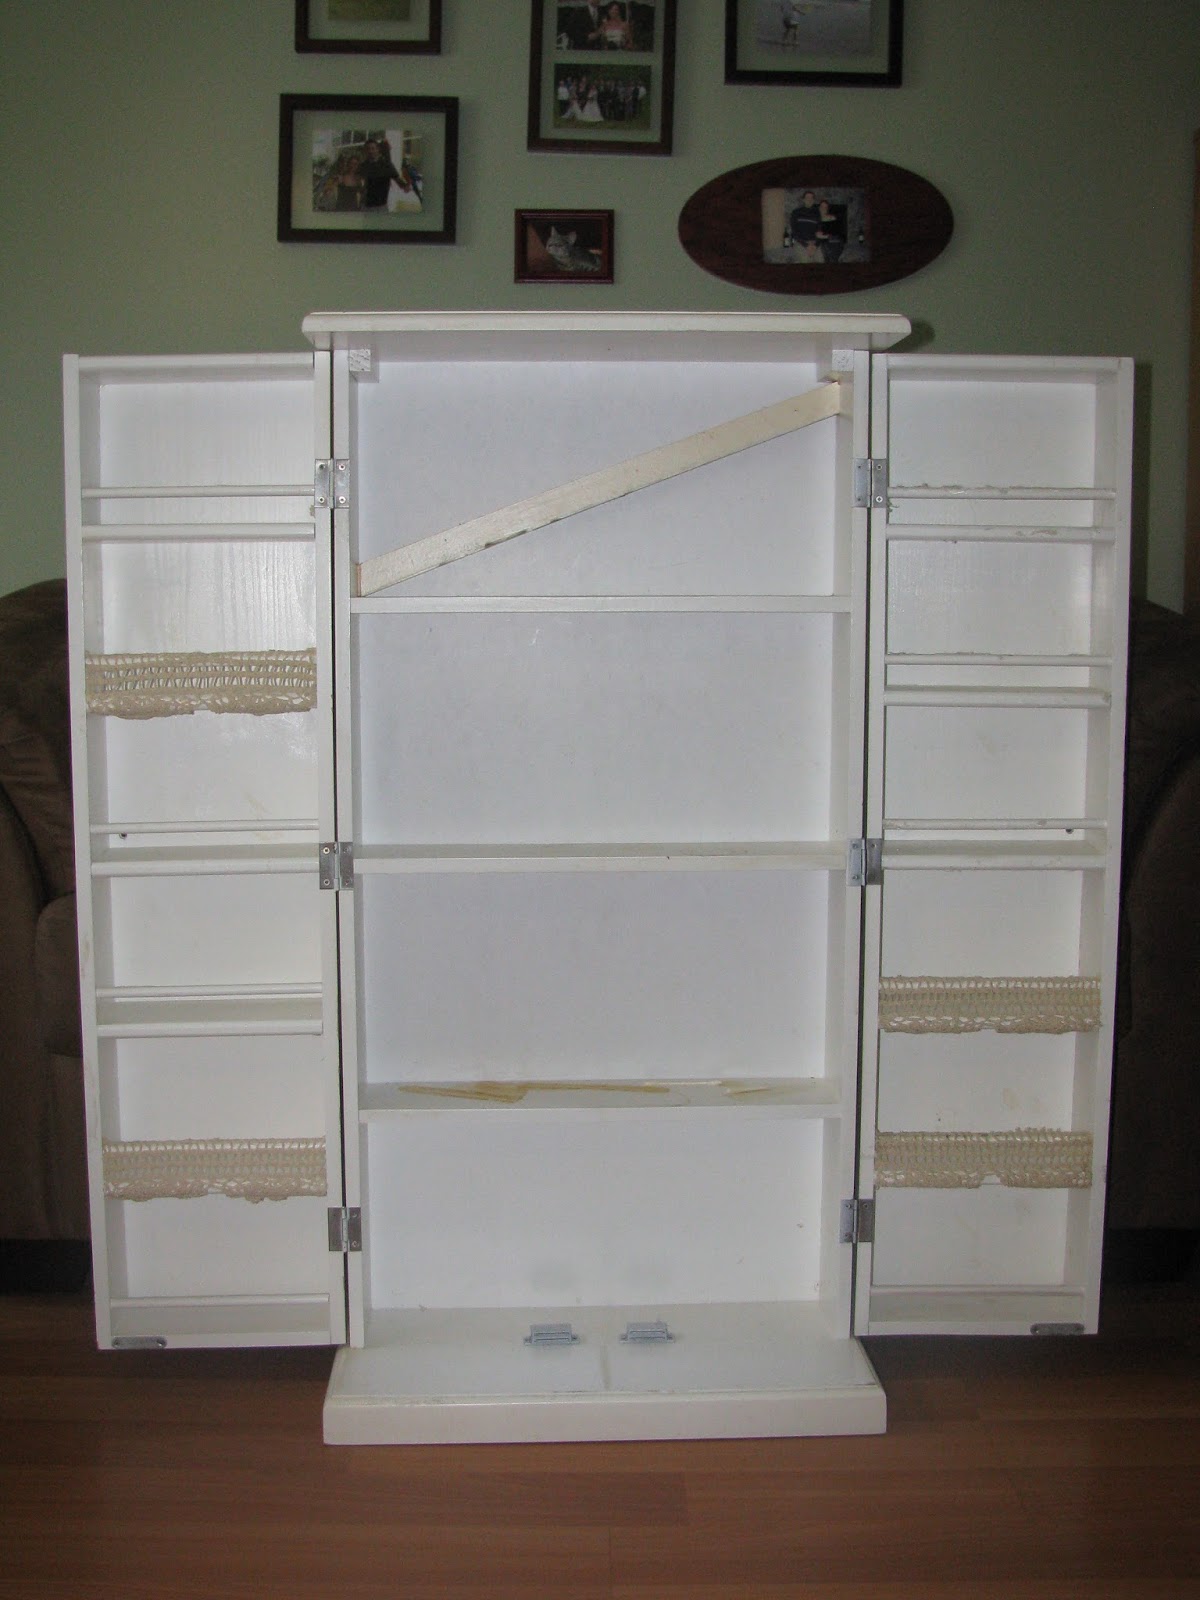
After the kids were in bed that night I started to just check to make sure that the plywood fit where it was intended to go and although I told my husband I was just going to check it and wouldn't be working on it right then because the kids were in bed and I couldn't be banging nails and stuff like that blah, blah, blah that's exactly what I ended up doing. I laid down some wood glue and put the plywood in place (it fit PERFECT, sliding in place with a couple of taps of the mallet) and then hammered in a few brads just to make sure it was secure.
 |
| I was lucky that the ledge that the drawer slid on went straight all the the way to the back of the dresser which worked perfectly for the support of the shelf. |
 |
| Tight squeeze. You probably could hear my less than exemplary language from where you were. You can also see the raw edge of the plywood which I needed to cover up with the $2 wood edging I bought. |
Next I measured and cut the edging and then glued and nailed that in place as well.
 |
| The use of a brightly colored pencil is not required but definitely adds some flare to your project. |
 |
| We'll just cover that up... |
 |
| Missing drawer conversion to shelf: DONE! |
Now it's time for COLOR! I dragged it outside, dropped it on my toe (OUCH!) and then vacuumed any remaining dust that may have been on it and taped it up with some large sheets of paper to protect the bottom from getting dripped on. Good thing the painters tape I used is so old that it didn't really hold up the paper! Oh well, good enough.
I was nervous about this part. I've never worked with wood stain before so I didn't know what to expect and honestly I wouldn't have been surprised if the can had grown lips and told me I wasn't qualified to use it when I opened it up. It did no such thing of course and went willingly onto my cheap foam brush. I painted it on slowly and consistently, overlapping my edges slightly as I had read was required for a nice finish. I let it sit for about 5 minutes (the can suggests 5-15 minutes but 5 was all I could stand) and then wiped it down with an old white cloth diaper to spread it out and make sure all the excess was soaked up. Now came the real hard part: waiting the 4-6 hours before doing a second coat!
 |
| That front piece of paper was a lost cause at this point. |
 |
| After one coat of stain |
 |
| After 2 coats of stain |
I stopped at 2 coats as I was totally digging the color it achieved. After a few hours I was ready to start putting on the polyurethane. Just like with the stain, I have never worked with poly before and after reading up on the best way to apply poly for a super shiny finish
here I was both prepared and completely intimidated. I hadn't been able to find a brush in all of Home Depot that's package said "natural bristles" so I decided to use one of the cheap foam brushes I bought instead. I was pleasantly surprised to find that the poly was pretty easy to work with; one good dip into the can with the brush was enough to make it close to halfway across the top surface. I got one good coat on it and let it dry overnight.
The next day I planned to second coat it and prime the bottom portion as well. I was not about to mess up my finish by wrestling it outside by myself again so I threw down a drop cloth in my dining room and opened a window (AFTER I wrestled the air conditioner out of the window by myself- RAWR). The can of poly says to use a 220 grit paper between coats so I very lightly sanded the dried first coat and cleaned it up thoroughly afterwards. I was a bit nervous as you could see the scratches the sand paper left in the shiny surface, even though I had sanded very lightly to avoid that very thing. I taped up the bottom (see below) to preserve a clean line between the stained and polyurethaned top and the painted bottom.
 |
| You can see the scratches left by the sand paper |
I got another coat of poly on the top and started priming. I got to the front and realized I'd forgotten to repair the big chunk that had been broken off one of the legs. Oops. I repaired it using some epoxy for wood repair and once it was dried and cured (about 15 minutes) I just sanded it flat and primed over it. Sweet :)
 |
| Stinky play doh for furniture DIY'ers! |
I was on a roll so I didn't stop there. After priming (2 coats) and drying I had my husband help me bring it outside and I started painting. I had picked out an off-white color for the dresser, something with a subtle "greige" under tone in a satin finish. It only took one coat. My excitement which was growing all day was peaking out at max levels. This dresser was looking
seriously good.
 |
| Wow, right?! |
I let it dry over the weekend because the next step was to antique it and I wanted to make sure that the paint was completely dry and sandable without peeling like latex paint is want to do. I grabbed my 220 grit sand paper and worked at sanding off areas of the dresser where you would expect to find natural wear over time. My goal with this was a natural antique finish rather than the heavy stuff I've been seeing all over the internet. I like a cleaner look, more chic than shabby. After that I applied the antiquing glaze in the areas where I had sanded and obsessed over this for at least an hour.
 |
| Sanded but before antique glaze |
 |
| After antiquing |
 |
| Subtle but it gets the point across |
I had saved the original hardware which was horribly dirty and tarnished. I cleaned them up with some warm soapy water and then scrubbed them with some steal wool before mounting them to some paper bowls and spray painting them with the oil brushed bronze finish paint I had used on a couple of previous projects. These were handles rather than knobs which presented a challenge as the handles would lay down on the flat surface when drying and that would obviously mess up the final finish. I ended up hanging the bowl with mounted hardware upside down inside my kids' sand buckets and let them dry that way. Brilliant, I know ;)
 |
| You'll just have to use your imagination as to what the hardware looks like drying upside down inside the buckets :) |
I also got a great tip from my step dad- after the second coat of poly I used steel wool to sand it down instead of the fine grit sandpaper and was relieved to find it worked much better. I got a good sanding and as long as I went with the grain of the piece you can't really see the very fine scuffs left behind. I did some research and found what I was looking for
here so that I can go back to the store and get a natural bristled brush for my third and final coat of poly. I found that the foam brushes introduced a lot of tiny bubbles in the surface so I wasn't going to get the super shiny unbroken surface I was after if I kept using those.
I was able to pick up a cheap natural bristled brush at the craft store in town and finished off the last coat of polyurethane. I really am thrilled with how it came out. I'm having a
really hard time with the idea of selling this little beauty. I just love it!
 |
| The top is so shiny I got a reflection like I was shooting a mirror! |
 |
| Close up of the distressed and antiqued finish |
Lessons Learned
#1: Foam brushes work great for stain but not so much for polyurethane. I was able to pick up a natural bristled brush for a whopping $1.49 so definitely get one if you're planning on using poly.
#2: Skip sanding with a fine grit sand paper on polyurethane. Maybe a finer grit paper would work better? I don't know but steel wool definitely does a good job. Avoid sanding in circular motions though and continue sanding with the grain of the wood for well hidden sanding marks.
#3: One man's trash is another man's treasure! Someone else deemed this dresser a lost cause and tossed it in the trash. I saw it differently and look what I ended up with!
I hope this inspires you to save something from the land fill and restore it to a new found glory. With just a little bit of work you might end up with something fantastic and it's cheaper and more fulfilling than buying particleboard run-of-the-mill McFurniture. Don't be ashamed to dumpster dive!